Nothing quite signals the arrival of grilling season like the aroma of perfectly cooked chicken wafting through the air. While many opt for smaller cuts, there's a unique satisfaction and surprisingly simple process behind creating a master grilled whole chicken. Imagine: impossibly crispy, golden-brown skin giving way to succulent, juicy white and dark meat – all achieved with minimal fuss and just three core ingredients. If the idea of grilling an entire bird seems daunting, prepare to have your mind changed. This isn't just a recipe; it's a game-changer for effortless, crowd-pleasing meals.
Unleash the Flavor: Why a Grilled Whole Chicken is Your Go-To Meal
There's a reason why a grilled whole chicken recipe is becoming a beloved staple for home cooks. Beyond the impressive presentation, it offers a symphony of flavors and textures that individual cuts can't quite replicate. The beauty lies in the bone-in, skin-on structure, which helps to insulate the meat, locking in moisture and rendering the skin fantastically crisp as it cooks over the open flame. Forget heating up your kitchen on a sweltering summer day; move the cooking outdoors and enjoy the gentle char and smoky notes only a grill can impart.
For those new to the experience, grilling a whole chicken can seem like a culinary Everest. But trust us, it’s far less intimidating than it sounds. With a few smart tips and tricks, this method is remarkably hands-off once the bird is on the grates. It requires just a few minutes of prep, allowing you to "set it and forget it" for much of the cooking time, freeing you up to enjoy your company or a refreshing drink. Whether you're a seasoned pitmaster or just getting started with outdoor cooking, this method promises a delicious outcome every time. Plus, it's incredibly versatile, adaptable for both gas and charcoal grills, ensuring everyone can achieve that perfect, juicy result.
The Essence of Simplicity: Just 3 Ingredients for Pure Perfection
One of the most appealing aspects of this particular grilled whole chicken recipe is its stunning simplicity. You don't need a pantry full of exotic spices or a complicated marinade to achieve incredible flavor. At its core, all you truly need are three fundamental components:
- A Whole Chicken: For best results, we recommend a 3 ½ to 4-pound whole chicken. This size is typically ideal for feeding 4 people and cooks evenly within a reasonable timeframe. Look for a fresh, high-quality bird for the best flavor.
- Olive Oil (or your preferred cooking oil): A generous drizzle of oil serves multiple crucial purposes. It acts as a binder, helping your chosen seasonings adhere to the skin. More importantly, it helps render the chicken's natural fat, contributing significantly to that coveted crispy, crackly skin we all crave.
- Your Favorite Seasoning: This is where you can truly make the recipe your own, even within the "3 ingredients" philosophy. A simple yet incredibly effective approach is a generous sprinkling of salt and freshly ground black pepper. However, feel free to elevate it with a pre-mixed poultry rub, a smoky BBQ seasoning, or even a classic blend of garlic powder, onion powder, and paprika. The technique is the star here, allowing your chosen flavor profile to shine through.
While the "3 ingredients" highlight the minimal essentials, don't hesitate to experiment once you've mastered the basic technique. You can certainly introduce other flavor elements, such as fresh herbs tucked into the cavity or a vibrant citrus zest rubbed under the skin. The beauty of this approach is that the fundamentals are so solid, they support a wide array of culinary explorations.
Mastering the Technique: Your Roadmap to Crispy Skin and Juicy Meat
Achieving a perfectly grilled whole chicken hinges on understanding a few fundamental techniques. It’s not about constant fussing, but rather strategic preparation and monitoring.
Preparation is Key (A Few Minutes That Matter)
Before your chicken even touches the grill, a little prep work goes a long way:
- Pat It Dry: This step is non-negotiable for crispy skin. Use paper towels to thoroughly pat down every surface of the chicken, inside and out. Excess moisture prevents the skin from crisping up effectively.
- Oil and Season: Once dry, rub your chosen oil generously all over the bird, ensuring an even coating. This not only promotes crispiness but also helps your seasoning adhere better. Then, apply your seasoning mix liberally, reaching into crevices and even under the skin of the breast for maximum flavor. Don't forget the cavity!
- Trussing (Optional but Recommended): Trussing, or tying the legs together and tucking the wings, creates a more compact, even shape. This helps the chicken cook more uniformly, preventing thinner parts (like the wing tips) from overcooking before the breast and thighs are done. While not strictly necessary for this recipe, it contributes to a better aesthetic and more consistent results.
The Magic of Indirect Heat and Vertical Roasting
The secret to a juicy interior and crispy exterior lies in the cooking method: indirect heat combined with a vertical roasting setup.
- Indirect Heat Explained: Instead of placing the chicken directly over the flames, you'll create a two-zone grilling setup.
- Gas Grills: Light burners on one side (or both outer burners) to medium-high, leaving the center burner(s) off. The chicken will cook over the unlit section.
- Charcoal Grills: Pile hot coals on one side of the grill, leaving the other side empty. The chicken will cook over the empty side.
This indirect heat creates an oven-like environment, allowing the chicken to cook through gently without burning the skin. - Vertical Roasting: This is arguably the most brilliant trick for an all-over crispy skin. A vertical roaster ensures that air circulates completely around the entire chicken. No part is sitting flat on the grates, meaning every inch of skin is exposed to the heat, rendering it crackly and delicious. If you don't have a dedicated vertical roaster, you can easily improvise:
- Beer Can Method: Prop the chicken onto an open, half-full beer or soda can (hence the famous "beer can chicken"). The liquid inside the can can add a subtle steam, contributing to juiciness, but the primary benefit is the vertical positioning.
- Bundt Pan: In a pinch, a bundt pan can also serve as a vertical support, though the very bottom part of the chicken might not brown as evenly as with a dedicated roaster.
Preheat your grill to medium-high heat (around 375-400°F) with the lid closed. Once hot, place your seasoned chicken on its vertical roaster over the indirect heat zone. Maintain a consistent medium heat, cooking for at least 60 minutes, or until it reaches the desired internal temperature.
Monitoring for Perfection (Don't Guess, Know!)
This is where any professional chef will tell you their most trusted tool comes into play: the instant-read thermometer. It eliminates all guesswork and ensures perfectly cooked, safe, and juicy chicken every time.
- Target Temperature: Insert your instant-read thermometer into the thickest part of the breast, ensuring it doesn't touch the bone. Remove the chicken from the grill when it reaches 160°F (71°C).
- Carryover Cooking: Due to carryover cooking, the internal temperature will continue to rise by a few degrees after removal, reaching the FDA-recommended 165°F (74°C) as it rests.
- Juice Clarity (Secondary Check): While the thermometer is paramount, a secondary visual cue is to make a small cut between the breast and the thigh. If the juices run clear, your chicken is done. If they are pink, it needs more time on the grill.
- The Rest is Best: Once removed from the grill, tent the chicken loosely with foil and let it rest for 10-15 minutes before carving. This crucial step allows the juices to redistribute throughout the meat, ensuring every bite is incredibly tender and moist. Skipping this step is a common mistake that leads to dry chicken!
Beyond the Basics: Flavor Variations and Serving Suggestions
While the three-ingredient approach delivers fantastic results, the beauty of this grilling technique is its versatility. Once you're comfortable with the core method, the possibilities for flavor customization are endless:
- Marinades: For an extra layer of flavor and tenderness, consider marinating your whole chicken for a few hours (or even overnight) before grilling. A Mediterranean-inspired marinade with lemon, garlic, oregano, and olive oil is always a hit. Just be sure to pat it very dry after marinating to encourage crispy skin.
- Compound Butters: For truly next-level flavor and moisture, try rubbing a compound butter (butter mixed with herbs, garlic, or spices) under the chicken skin before grilling.
- Glazes and Sauces: During the last 15-20 minutes of grilling, you can brush the chicken with a BBQ sauce, a honey-mustard glaze, or a simple lemon-herb basting liquid. This adds a beautiful sheen and caramelized flavor.
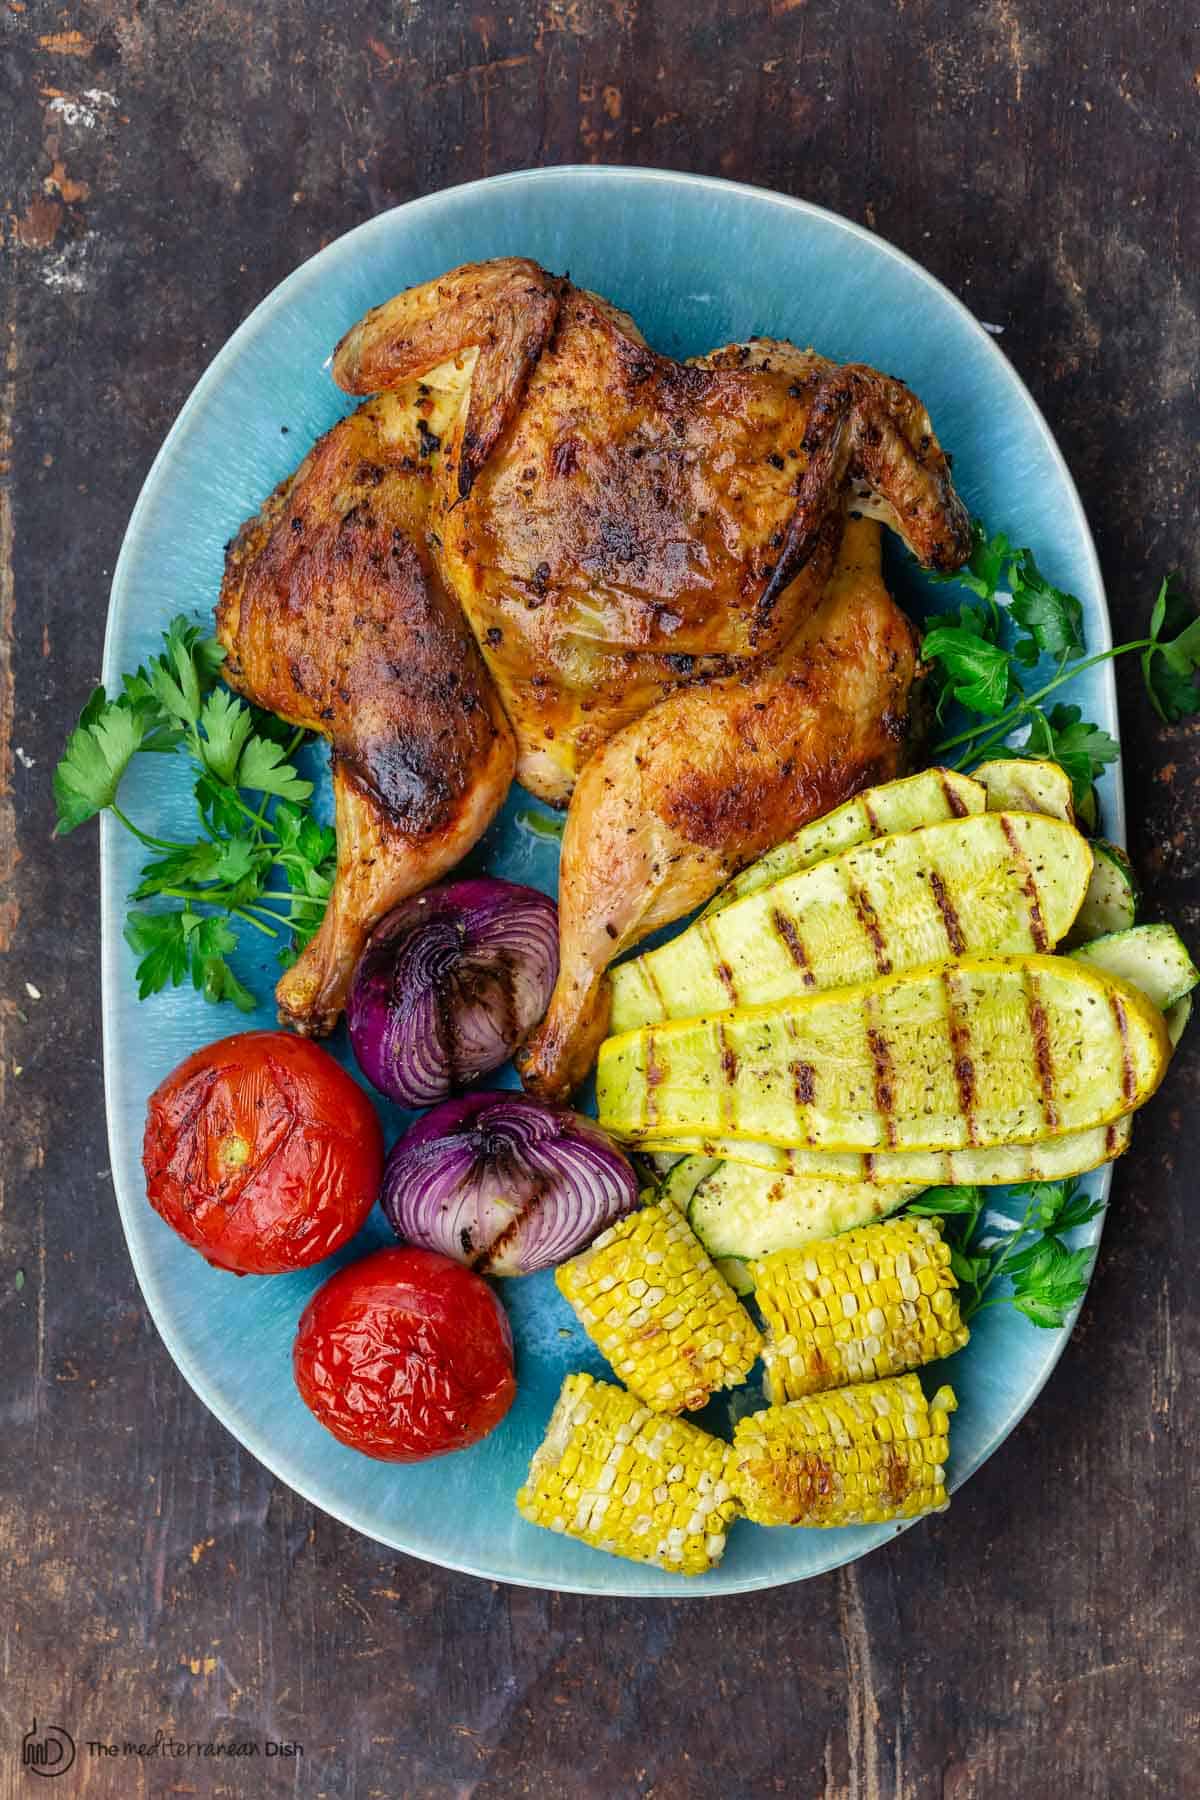
- Serving Suggestions: A perfectly grilled whole chicken pairs wonderfully with a variety of sides. Think grilled vegetables like asparagus or bell peppers, a fresh green salad, creamy mashed potatoes, or even a vibrant quinoa salad. It's a centerpiece that truly shines.
The Ultimate Outdoor Feast Awaits
Grilling a whole chicken isn't just about cooking; it's about creating an experience. It's about gathering loved ones, enjoying the outdoors, and savoring a meal that feels both gourmet and entirely approachable. With just three simple ingredients and the straightforward techniques outlined here, you can confidently achieve a master grilled whole chicken featuring that coveted crispy skin and unbelievably juicy meat. So, fire up your grill, embrace the ease, and prepare to delight everyone at your table with this truly effortless and delicious outdoor feast.
